Friday, May 31, 2013

Caramel Frappuccino.


           Before the summer was here at my doorstep, I had school. And usually after school, I either hit up the happy hour at Sonic or popped by Starbucks. Usually, though, it was Sonic that I frequented. Starbucks was a special treat that I limited to a once a week thing. When it was quite warm, I would get either get the caramel frappuccino or the Caramel Ribbon Crunch Frappuccino, which is a rather new drink available for the summer at Starbucks. The Caramel Ribbon Crunch is most definitely my favorite. After the first sip I took, I was hooked. 

       
 The only thing that I wasn't hooked on was the price. To get a Tall Caramel Ribbon Crunch Frappuccino was $4.25 with tax. That's only 12 ounces. To me that is a little pricey. After shelling out the almost $5, I finally had a light bulb shine bright above my head. Why not try to make frappuccino at home? Why I had never even thought of this before is beyond me. But after that light bulb lit up, it was like a whole new world was opened up to me. 
     
        Let's first talk about the basics of frappuccinos. Basically, a frappuccino is ice and milk blended together with syrups and other delicious flavorings. This I knew.  What I didn't know, though, was the ratio of ice to milk. That was my most basic question. 

        The recipe I found was very basic, which was what I liked. It didn't give embellishments so that a reader could be creative on their own. The best ratio of ice to milk I have found is 1 cup of ice to 1/2 cup of milk. This may depend on your taste but this will at least give a place to start.

      Now the next part was the amount of coffee or expresso to add. This I found varied in each recipe I found. So I came up with a happy medium, which I will mention below later. The fun part was finding the syrups to add and the amounts. Of course with a Caramel Frappuccino, you need caramel (duhhh). And with a Chocolate Chip Mocha Frapp.  you need Chocolate chips (duhhh) and coffee. So a lot of the ingredients were self explanatory, but what wasn't was the amount to add. 

    The syrups Starbucks uses are a bit pricey, but you can always use caramel sauce from the grocery store. For the caramel, I make my own and I will be putting the recipe up later. For chocolate syrup, I use the chocolate syrup from Hershey's. For a vanilla syrup, I make my own (which I will be putting up at a later time, too). But you can also just use vanilla extract and a little sugar. For the moment, though, I am just going to put up the recipe up for a Caramel Frappuccino.
   

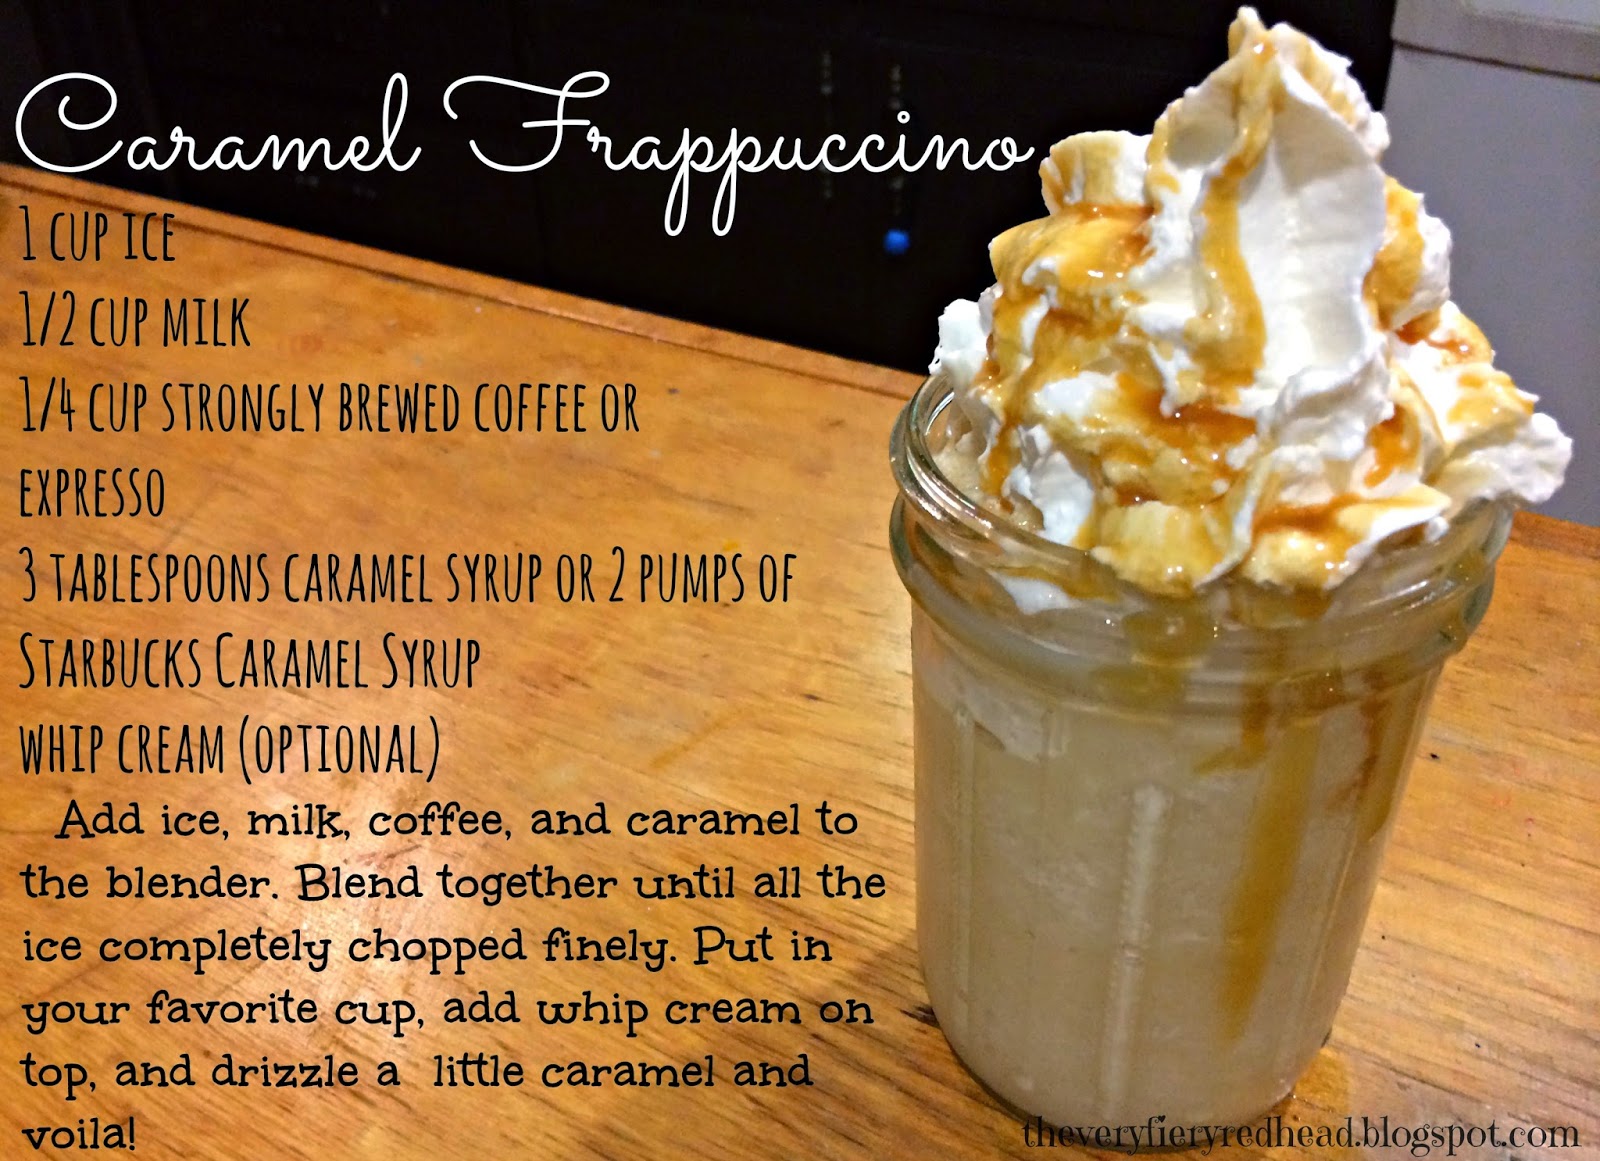
        Ingredients for a Caramel Frappuccino:
1 cup ice
1/2 cup milk
1/4 cup strongly brewed coffee or expresso
3 tablespoons caramel syrup or 2 pumps of Starbucks Caramel Syrup
whip cream (optional)

    Add ice, milk, coffee, and caramel to the blender. Blend together until all the ice completely chopped finely. Put in your favorite cup, add whip cream on top, and drizzle a  little caramel and voila!


As you can see this is so simple to make and so much cheaper. I hope this recipe is as great for you as it is for me! Now sit back and enjoy a cool slurp of your handiwork. 
                                                                       
                                                                                                                          Andrea

Sunday, May 5, 2013

A curly do.

Hello everyone! It's been much to long since I have updated anything. I have been super busy with so many wonderful things. One of these wonderful things was prom, I recently had prom, and for my prom I did my hair and three of my friends' hair (which was a lot). And then I styled four more people's hair for a different prom which was 2 weeks after mine. With that alone I have kept busy. But on top of that the school year is starting to wind down (thank goodness!), and with that happening teachers are piling the homework on to us and I am having difficulties with trigonometry which does not help the situation. And about 3 weeks ago, the play which I had been working on for 2 or 3 months was finally over with which was bitter sweet (mostly sweet, though). To make things even better I have this cold or something which is just peachy. And with this cold, I have a solo in my choir concert this week, hopefully I will be better by then (fingers crossed!).

But since the prom season for me is finally over with, I wanted to make a new post. And this new post is about a curly hair style  I did on my sister's hair. She has amazing long soft hair and is just so much fun to play with but she doesn't let me do so very often. But when she does it is like opening presents on Christmas morning (slightly exaggerated). This hairstyle that you will see was for a formal 8th grader thing at her grade school. It was so pretty!


To do this curly do you will need:

  • 1/2 inch- 3/4 inch curling iron. Or if you have a curling wand that will work to. (I didn't use a curling wand because mine was broken, so instead just wrap the hair around the barrel of a normal curling iron and don't use the clip)
  • bobby pins
  • flower or some other cute hair accessory 
  • hair spray and a heat protectant (to keep from getting damaged from heat)
  • comb to tease hair
  • clips to section hair
To do this hairstyle:

  1. First start by sectioning the hair to curl. I just did a standard section by doing the bottom section first and then a middle section and so on.
  2. Next get a piece of hair 1/2 to 1 inch thick. It depends on how big and thick you want the curls to be. I did most of mine about 1/2 inch thick. 
  3. After getting a piece of hair wrap the hair around the barrel. Leave it on the barrel for 10- 30 seconds and this to depends on how hot your curling iron is. Make sure not to leave it on there for to long. 
  4. Continue doing this until you have done this to all the hair. Make sure to hair spray your hair after each section or spray after curling it all.
  5. After curling all the hair, comb back from the top your head to the crown. Then tease the hair near the crown to give the hair some volume. 
  6. The hair that you just combed back and teased at the crown pin back with bobby pins at the back of the head in the middle. Make sure that on each side you take about the same amount so it looks even. Also make sure hair in front of the ears is pinned back with it. 
  7. After sufficiently bobby pinning, put the flower or other hair accessory in the middle where the bobby pins are. I placed mine right over the bobby pins so that the pins could not be seen. 
  8. Spray hair once more with hair spray with good measure.

And voila you are done!
... It's that easy. And rather adorable. Hope my instruction weren't unbearable and weren't to confusing. Remember have fun!

                                                                          Andrea 


Sunday, April 14, 2013

Quick and easy brownies.


Ever in a hurry and craving something chocolaty? Well, I do on occasion. On such occasions, I may have made these quick and easy brownies. These brownies always hit the spot. The great things about brownies are that they are chocolaty, gooey, and most usually everybody loves them. In my family, they never last more than a day. The other day I made these to go with some homemade chocolate ice cream that I made. 

To make these brownies you will need:
  • 2 cups white sugar
  • 1 cup butter
  • 1/2 cup cocoa powder
  • 1 teaspoon vanilla extract
  • 4 eggs
  • 1 cup flour
  • 1/2 teaspoon baking powder
  • 1/4 teaspoon salt
  • 1/2 cup walnut halves (optional)
Directions:
  1. Preheat oven to 350 degrees. Grease 9 x 13 pan.
  2. Melt butter. Then mix all ingredients in the order given.
  3. Pour into greased 9 x 13 baking pan and bake at 350 degrees for 20 to 30 minutes.
Optional: sprinkle a little powder sugar on top for an extra touch.
** I sometimes use a sheet cake pan, instead of a  9 x 13, though you must adjust the time.


As always enjoy.
Peace, love, bake on.
                                   Andrea

 I found the original recipes here, but I made a few changes to make it my own.

Saturday, April 6, 2013

Hairs ideas for PROM-- Part II


Hey everyone! So I promised another post devoted to Prom hairstyles, and I intend to follow through. I have  just been so busy. Among fighting sickness, getting lines memorized, and getting songs down and memorized, I almost forgot about it. To say the least I keep busy, usually. 

So if your prom isn't already here or isn't around the corner, it will be soon. It comes faster than you think. Time really flies by. 

So I have a friend that asked me to help her find a hairstyle for prom for her hair. She has short brown gorgeous hair. She has a strapless gown, so she wants her to be down. And so I had a mission, and on my mission I found that a lot of hair style were similar, especially when  they were hairstyles that were down loose instead of up in an up-do or something. But I learned after realizing that it all depends on the technique in which you style and prep your hair.

So I wanted to give some ideas and pictures to show you some different ideas for short curly hairstyles.

This hair style is super cute and fun. To do this hairstyle, you could either use a 1/2 curling iron or 3/4 inch curling iron. Depends on how short you hair. I can't guarantee the same results, but it should be the type of curl. Here is a good hair tutorial for this type of hairstyle. Looking on YouTube for tutorial is a good source to help you curl your hair.  This would be great if you want something care free and bouncy. 


This hairstyle is very vintage but screams classy! Personally, if I had short hair this is how I would always wear my hair. I feel like it is a timeless hair style. I found a couple great tutorials that I have to share with you because they each go at it with a different technique but they are each so pretty. Here is the first one, my favorite, I think. Another one you find HERE, is also really good. And the last two that I also love are HERE and HERE. I am sure there are even more great ones that are on YouTube, but these are the ones that stood out to me the most. 


There are two other prom hairstyles I found but couldn't find good pictures to depict them. So I am just going to direct you to tutorials. The first is curling you hair with a flat iron. It would give you a unique curl, and you can find a good YouTube tutorial here. It even shows you how to add volume. BONUS! Last but certainly now least, I found this super chic hairstyle tutorial that I just have to share, and you can find it right here. I love it.

All these hairstyles would be great for prom, you just have to dress them up, add volume and a flower or a different accessory. You could even try to incorporate braids. I love braids. And they always look cute. For example you could curl your hair and then do a water fall braid. Just in case you don't know what or how to do a waterfall braid, so here is one that'll teach the basics.  

Those are some ideas, and now just run with it. Be creative. Thanks!


                                                                   Andrea 

Sunday, March 31, 2013

Cinnamon roll pancakes


I love pancakes, and I love cinnamon rolls. So why not combine them? Duh. So that is what I did. I had found a recipe for one on Pinterest and was linked to this website. It was very detailed and had great instructions, though I made a few twinks to it when I made this scrumptious breakfast food. 

My family, especially my little brothers, loved these pancakes. They really loved it with the attached cream cheese  glaze/syrup that goes on top of these wonderful pancakes. 

When I made these the first time, I used a pancake mix I had on hand and mixed it up like I normally do. 


Ingredients:

Cinnamon Filling:
4 tablespoons (1/2 stick) unsalted butter, just melted (not boiling)
1/4 cup + 2 tablespoons packed light brown sugar
1/2 tablespoon ground cinnamon

Cream Cheese Filling:

4 tablespoons (1/2 stick) unsalted butter
2-ounces cream cheese, at room temperature
3/4 cup powdered sugar
1/2 teaspoon vanilla extract

Pancakes:
1 cup all-purpose flour
2 teaspoons baking powder
1/2 teaspoon salt
1 cup milk
1 large egg, lightly beaten
1 tablespoon canola or vegetable oil

Directions:

Prepare the cinnamon filling: In a medium bowl, stir together the butter, brown sugar and cinnamon. Scoop the filling into a quart-sized heavy zip baggie and set it aside (see *Tips below).
Prepare the glaze: In a small pan, heat the butter over low heat until melted. Turn off the heat and whisk in the cream cheese until it is almost smooth. Sift the powdered sugar into the pan, stir and add in vanilla extract. Set the pan aside while you make the pancakes.
Prepare the pancake batter: In a medium bowl, whisk together the flour, baking powder and salt. Whisk in the milk, egg and oil, just until the batter is moistened (a few small lumps are fine).
Cook the pancakes: Heat a large, nonstick skillet over medium-heat and spray with nonstick spray. Use an ice cream scoop (or 1/3 cup measuring cup) to add the batter to the pan. Use the bottom of the scoop or cup to spread the batter into a circle (about 4-inches in diameter). Reduce the heat to medium low. Snip the corner of your baggie of cinnamon filling and squeeze the filling into the open corner. When your pancake begins to form bubbles, add the filling. Starting at the center of the pancake, squeeze the filling on top of the pancake batter in a swirl (just as you see in a regular cinnamon roll). Cook the pancake 2 to 3 minutes, or until the bubbles begin popping on top of the pancake and it's golden brown on the bottom. Slide a thin, wide metal spatula underneath the pancake and gently but quickly flip it over. Cook an additional 2 to 3 minutes, until the other side is golden as well. When you flip the pancake onto a plate, you will see that the cinnamon filling has created a crater-swirl of cinnamon. Wipe out the pan with a paper towel, and repeat with the remaining pancake batter and cinnamon filling. Re-warm the glaze briefly, if needed. Serve pancakes topped with a drizzle of glaze.

Tips:
*Quick and easy tip: Use a boxed pancake mix as the base for this recipe.
*Tips for the cinnamon filling: Before swirling, open up the baggie again and give it a good stir to re-incorporate any butter that may have separated from the sugar. You want the mixture to thicken a bit- it's best when it's similar to the squeezing texture of a tube of toothpaste, which will happen if you leave it at room temperature for several minutes. Don't try to use the filling for the pancake swirl unless it has thickened as it will be too runny to make a solid swirl.
*Keep the heat low or your pancakes might cook up too quickly. Don't flip them until you see those bubbles starting to pop on top. Flip them with a wide spatula so you can grasp the whole thing without batter and filling dripping all over the place!

***I found this directly from this wonderful website called Recipe Girl. She has a wonderful site, check it out. 

Thanks and enjoy!
Peace, love, bake on.
                                           Andrea 
                                

Saturday, March 30, 2013

Cream cheese frosting

Who all loves cream cheese? I love cream cheese. Though my dad doesn't like it in desserts such as cheese cake, he does like it in dinner foods, such as dips, like Chicken Buffalo Dip. And he does not like cream cheese frosting, he hates it. But I love it. One of the many differences between my dad and I. 

For Easter this year, I made many desserts including a carrot cake and with carrot cake, you must have cream cheese frosting. So I decided to share my cream cheese frosting with you. It is super easy and yummy! So here is the recipe.


Ingredients:

  • 4 ounces cream cheese(1/2 cup)
  • 4 ounces butter, softened (1/2 cup)
  • 2 cups powder sugar
  • 1 teaspoon vanilla extract 
Directions:

  • Using mixer beat cream cheese and butter together until smooth. Mix in powder sugar until smooth. Add vanilla extract. Beat until smooth. Enjoy!

It's that easy. This recipe can easily be doubled or tripled. I do quite often. If you want it to be thicker add a half cup or more of the powder sugar to make it thicker. 

Thanks and enjoy!
                      Happy Easter! 

                            Andrea 


Sunday, March 17, 2013

Blueberry Cobbler

Everyone loves blueberries, right? Well this dessert will sure be hit with anyone who does. It's so good and guess what? Really easy to make as well. (YES!) 
My dad for a while had been wanting me to make blueberry cobbler, and so I found and used my favorite cobbler recipe. 
The great thing about this recipe is that you don't have to use blueberries. You can use any fruit. It's very versatile. This recipe double nicely. Also, I should note that, I use this cobbler recipe as the base for all my cobbler. So, if I make peach cobbler is just sub in peaches for the blueberries. 
I could eat this whole thing by myself. There's not just eat one serving. It's so scrumptious. Words or pictures really can't describe it loveliness. It's even better served warm with a scoop of French vanilla ice cream. Consider yourself warned. 

Quick and easy blueberry cobbler dessert

Blueberry Cobbler
adapted from allrecipes.com

Ingredients
  • 6 tbs. butter
  • 3/4 cups sugar
  • 1 cup self-rising flour (or 1 cup flour, 1 1/3 tsp. baking powder, & 1/3 tsp. salt)
  • 1 cup milk
  • 1 (21 oz.) can blueberry pie filling or other fruit(You don't have to use pie filling)
Directions:

  1. Preheat oven to 350 degrees.
  2. Melt butter and pour into a 2 or 2.5 quart casserole or baking pan. Mix sugar, flour, and milk together.
  3. Pour mixture into pan over butter, but do NOT mix. Pour blueberry pie filling over mixture, but do NOT mix. 
  4. Bake at 350 degrees for 1 hour. 
  5. Serve warm with ice cream, if you desire to do so. 
*When I made this I wanted to get it baked in 45 minutes, so I preheated the oven 375 degrees instead of 350 degrees. At 375 degrees I baked it for 45 minutes. I would still recommend to cook at 350 for 1 hour if you have the time. 
** My 2 and 2.5 quart casserole/ baking dishes were being used or dirty, so I used a 9x13 pan, which was 3 quarts instead of 2 or 2.5 quarts, but it baked nicely and looked good, too.

I hope you enjoy this recipe as much as I do. Good luck, as always! 

Peace, Love, Bake on.

                                                          Andrea